Westville: Landscaping

Yay, I finished landscaping the Westville! I’ll share a couple of techniques I experimented with.

I added a grass sheet around three sides–but I think a grass sheet on flat board looks unnatural. Most lawns aren’t flat. They’re hummocky and humpy, as we discover when we mow (I no longer have a lawn at my real house, which is fine by me.)

This weird-looking thing is packing material from something or other I ordered–I think an electric tea kettle. It’s cardboard. When I looked at it, I thought “pavers” so I saved it.

This is nice material, because it was easy to tear apart and then cut into shapes for a front walk. I sealed it with satin varnish, which did not change the color or deteriorate. I didn’t try to paint it, but it’s essentially paper so probably that would work.

I decided to glue the packing material on the base randomly to make small humps in the lawn.

The grass sheet glued on over the humps. It makes the lawn look more realistic, I think. This packing material could be mounded to make hills and so forth. The texture is bark-like–it could be used to make a tree or a fairy room inside a tree trunk. Many possibilities.

I used paper patterns for the grass sheet–it does not look good if it’s not all one piece, because the seams show.

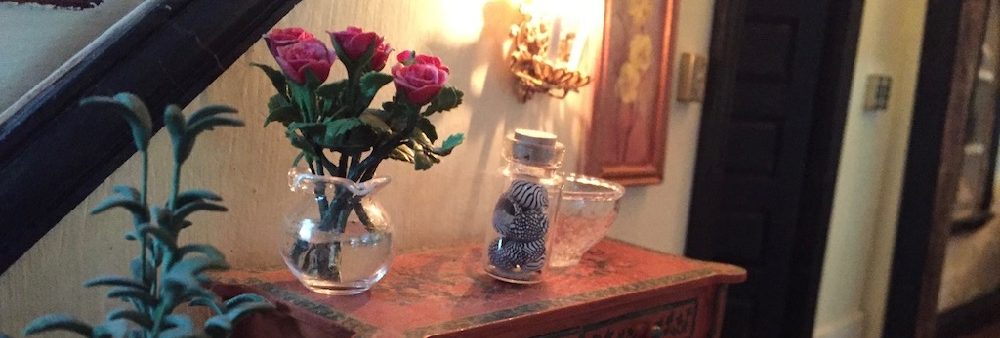
I added flowering plants, window boxes, a hedge, little trees, etc.

This little wagon is a cute kit I picked up at the NAME show in Tucson a few years ago.

Tip: I used double-stick tape to hold these window boxes on. Because of the texture of the house and the smooth painted wood of the box, glue did nothing but sit there. My husband finally said, “you know, I have some great double-stick tape,” and I commandeered it! At least a few small pieces.

This old-time wringer / washer is by a miniaturist in the Netherlands. I found it at an online show a few years back. I thought it would be appropriate on the porch of an antique shop. The handle spins the washer around–it’s precisely made.

Inside are the dirty clothes and the soap. I love it.

The sign for “Westville Antiques.”

I used the same packing material to make pavers across the back.

I was not at all sure about this house while building it, but now that it’s done and landscaped, I like it.

I’ve started putting in the jumble of furniture. I’m going let it sit and then seriously fix up the interior.

For now, I’m having the “I finished this project, what now?” blues. I have many other projects I can start, but I kind of stare at them, unable to fix on one. It’s not because of the pandemic–I’m always like this! Once inspiration strikes, I’ll go full steam again. I probably just need a break. I’ll look at other people’s minis for a few days. 🙂 Oh, and write books. I should be doing that.


Beacon Hill: New Chandelier. Westville: Finished interior

I added a new chandelier to the living room of the Beacon Hill. I purchased this from Luminations by Mr. K (Tim Kraft) at the Good Sam show last October.

Easier to see what it looks like with the light off.

I took the chandelier that had been here, one I made, and moved it to the Westville:

That lets me segue to the Westville: I have now finished all the interior moldings (baseboards, cornices, and other trim) and trimmed the raw edges of the house.

The closet under the stairs is ready for junk.

I’m going to do the outside landscaping and then move in! This house will be an antique shop, a nice jumble of finds.

You might notice that I changed the appearance of this blog. I wanted something a little cleaner and easier to read. I think I like this theme, but I’ll see! Don’t be surprised if it changes again. 🙂

More Instructions

I have now added the schematics and instructions for the Fairfield 1/2″ scale house and the Beacon Hill (1″ scale) to the page of instructions.

https://jennsminis.wordpress.com/greenleaf-instructions-schematics/

As I indicated before, Greenleaf will also help with anything missing in their kits:

https://shop.greenleafdollhouses.com/ (phone and address at bottom of page)

I don’t have instructions for any other kits, as these are the only three I’ve done (Westville, Beacon Hill, Fairfield). Not sure I will do anymore big dollhouse kits. No room!

I have finished furnishing one of my 1/4″ houses, which I’ll post about next. Some lovely stuff.

Keep calm and carry on mini-ing.

Westville Instructions

I’ve heard from several miniaturists over the years that they’ve obtained Greenleaf kits missing the instructions. I decided to scan the instructions for the three houses I’ve done (warmup sheet, schematics, and instructions) to help out. I’ve done the Westville, and I will do the others I have soon.

Go here: https://jennsminis.wordpress.com/greenleaf-instructions-schematics/

for PDF files to download and print.

Hope this helps.

For other houses, contact Greenleaf–I hear their customer service is very good, and they’ll get you the missing instructions.

https://shop.greenleafdollhouses.com/ (phone and address at bottom of page)

Thoughts on the Westville

I’m still adding baseboards and things to the Westville, but the house is essentially done, so I wanted to do my “thoughts on” post.

1) I think this is a good first Greenleaf house. The main pieces are simple, though they take a bit of wrestling to fit together precisely. As always, I had warpage, and the delicate filgree on some of my pieces crumbled to dust when I punched them out of the sheets.

2) The staircase was the least complicated of the Greenleaf houses I’ve done. There’s not much more to it than the steps and stringer. No complicated landings, and the railing is a single continuous piece.

Post featuring the Westville staircase.

3) The Westville is roomy for such a small house. Four main rooms plus an extensive attic:

The two largest rooms are deep (14 inches). I thought of putting a wall crosswise in either of them to make a small room at the front (e.g., a bathroom in the upper room) maybe viewed through open double doors. I won’t for this house (it’s an antique shop), but it’s an idea.

4) The bay windows are simple too–two walls that butt together to form a triangular bay.

5) Also you can see in the photo above, I reinforced the base with extra wood strips. As with all Greenleaf houses, I don’t find the foundation pieces sturdy enough for my liking.

6) The porch I found a little tricky because the instructions weren’t that clear, but once I had all the pieces laid out, it was fairly easy.

My post on the porch

7) The shutters were simply two sandwiched layers–the trickiest part is that there are so many! One thing this house has an abundance of, is windows! 11 of them.

My post on the shutters.

8) I went a little nuts on the exterior, wanting to try a stucco and stonework look.

I’m not sure I entirely like the result, but it was a good learning experience. I can also picture this house sided and painted in pastel colors, maybe used as a dress shop or flower shop.

9) In conclusion, I’m glad I put together the house. It has a small footprint but a lot of room. It could be a full regular house (with kitchen / living / dining, bedroom / bathroom, attic), and it lends itself well to other interpretations: A shop, a guest house, studio, library, old farmhouse, so many things.

This is the simplest of the Greenleaf houses I’ve done. It would be a great learning house before tackling some of the others (like the Beacon Hill!).

The biggest problem I had was, as with all their houses, the wood that is very thin and easily disintegrates or warps. Part of that is the climate I live in (very dry), and part of that is probably shipping (boxes get too hot or cold). The good thing is that once it’s glued together and finished, the warpage is hidden, plus I was able to compensate for the trim that crumbled away.

As I continue finishing the interior and landscaping, I’ll post more pics. I plan to make this an antique shop, where I can put all the things I’ve made or collected that don’t yet have homes. Stay tuned!

Click the “Westville Dollhouse” tag on the post or search “Westville” to see all posts on this house with the full build.


Westville: Front Door, Interior patterns

I’m finally working on the interior of the Westville. I like that the rooms are large. Though it’s a small house, it’s spacious.

I’ve wallpapered and put in flooring, though I haven’t finished the trimming yet. Need to do a lot of trim! (baseboards, cornices, anything to cover up raw edges)

I’ve put in a closet under the stairs–cut the solid piece that goes here and hinged it as a door, and added a light inside. I’ll fill the closet with goodies.

The front room with the door. My front wall crumbled around the door opening, so I had an opening far too tall for the door. My solution–add a transom.

I built a simple frame and sandwiched a colorful piece of tissue paper between two pieces of clear plastic to make a stained glass transom.

When I made the door itself, I decided to put wallpaper on the interior side to show through the panels.

The outer door I painted to match the house colors. By the way, once the door was together, I had to sand, sand, sand, sand to make it fit into the opening. It could be hinged if you want.

Door from the exterior–sorry photo is so dark.

Paper patterns made things so much easier. I used parchment paper–it is easy to fold, tape, and shape. Here I’ve made a pattern for the flooring. I’d started to use the unused siding strips to make flooring, but it looked terrible, so I went with commercial flooring sheets.

For the upstairs walls with windows–only one pattern is needed. The window walls in the two rooms are identical.

I picked a wallpaper printed with books for this room, and then a complimentary paper for the slanted wall. I like how it turned out.

I have the railing from the stairs glued in here now, with baseboards. By the time I put in the railing, I’d lost the last square post top, and had to cut a new one. 3/8 x 3/8 square x 1/8 thick.

The paper patterns are also handy for cutting the cornice pieces. I can mark the angle (which is 60 degrees).

I have more to do–finish all the baseboards and cornices and trim the raw edges around the house openings.


After that I’ll do some landscaping. I’ll put a walkway to the front door plus grass, bushes, vines if I can, and so forth. I have flower boxes for the windows (as you can see).

More to come!

Westville: Staircase railings and some Window Trim

Finally, the staircase railings and window trim.

Interior window trim (top), bay window trim (long pieces, right), staircase posts and railings (bottom).

Looking at the staircase posts and railings: There are two posts (they go vertically at the bottom of the staircase), a long rail for the long side of the staircase bannister, and a short rail for the short side of the staircase. The small square pieces are caps for the posts.

Interestingly the post at the bottom goes only on the outside of the staircase, like this. Not at the end. I guess they figure it will be too hard to see the end of the staircase through the windows. The front of the staircase is basically bare. I will probably add my own posts and trim later.

One post cap goes on the top of the post.

Long staircase railing goes on top of the long bannister, all the way up through to the second floor. The narrower part goes through the second floor opening.

The short bannister side. The post again goes on the outside only, with the post cap. Short bannister railing goes on top of the bannister.

Next: The second floor bannisters / railings.

Two bannister pieces, four posts, three post caps (only three), two railings.

On the long side: Two posts go on either end, on the outside only. They’re glued right onto the flat part of the bannister, not the ends. Horizontal railing goes on top.

On short side, two posts sandwich the banister on one end. The bare end of the short side is glued to the bare end of the long side.

The assembly upside down, keeping straight in my jig while the glue dries.

The railing will go here on the second floor. I won’t glue until I have the flooring and wallpaper in place. The end of the long banister section meets with the staircase bannister to sort of form a post. A post cap will go on top of this.

From the side. I’ve already put the post caps on the short side but will wait to install to do the long side.

Interior Window Trim

There is nothing much to the window trim. Take the rectangular pieces:

Paint and finish. The plastic window piece gets glued to the underside of the trim, and then the whole thing is glued over the window opening from the inside.

I’ll show more pics of window trim as I paper and finish the inside of the house.

And that is more or less it! The kit has been put together all the way through to the end of the instructions.

All that’s left is to decorate and move in. I’ll continue to show my finishing process, and also provide overall thoughts and tips on this house.


Westville: Trim

Last post, I said I’d back off the Westville, but it called to me! I have been very busy with other life–my job, having a tooth pulled, and other fun stuff–so not as much mini activity as I’d like. However, I managed to get into my mini room and do things every once in a while.

First thing I did was realize I had to fix the ornamentation around the bay window interiors. These decorations are part of the main sheet, and when I originally punched out the wall, the small details crumbled away into dust. I tried to repair, but I decided it was no use.

The right room’s was even worse.

After much debate, I decided to simply cut them away and sand down the opening. I left a few bumps.

This was my solution. The long pieces are from the Westville kit, the bay window trim. The horizontal piece is supposed to go all the way flush against the ceiling, resting on top of the two side pieces. I cut the horizontal piece to go in between the side pieces to hide the ragged edges of the old trim. I’ll do a cornice above.

I finished the trim with brackets I’d had in my stash. Luckily, I have four, so will use the other two on the second bay window.

I had planned to wallpaper the bay window with the blue, but I did not realize I’d run out! So I went through my stash of scraps and found wallpaper that matched in color and used that for the bay window.

The flooring is the siding that comes with this kit. To cut to fit the bay window, I did a pattern with a sheet of paper, laid the boards on it, and cut before laying the boards in the house (without the paper).

I puzzled over where the “center partition trim” went, but I finally concluded it is here, separating staircase railing from the wall in the entrance room.

Here it is after I’ve put in some wallpaper and stained the trim.

Next time, I’ll show the staircase railings and the second floor staircase bannister.

Westville: Shingles

The Westville kit comes with shingles in sheets. An advantage is adding the shingles in strips instead of individually. The disadvantage is punching out the strips. Challenging!

While the shingles are still in the sheet, I ran a piece of masking tape across the top of each row, then punched them out of the sheet (tore them out, wrestled them out, however you want to put it).

Guidelines are a good idea, and help keep the rows straight. First row is 1 3/8″ from the edge. The rest of the rows are 3/4″ a part.

Strips are hot-glued in place. Once dry, masking tape gets removed.

The next row is glued on, the shingles staggered (this means at the end of every other row, you have to do a half shingle to keep everything on track).

I used hot glue, because any water-based glue (tacky, Elmer’s, etc), will make these very thin wooden shingles curl. Another, non-water-based glue would be fine I think.

If shingles overhang the edges, that’s ok–they can be trimmed off later.

To cut the shingles to fit the angle of the gable, I made a template out of paper.

This serves as a gauge to cut the shingles to the correct angle.

Using the gauge ensures the end of the row will fit. I did a template for the front roof too.

The nice thing is, the templates I used for the front worked on the back roof angles as well.

All shingles in place, and ragged edges trimmed off. Whew!

The shingles looked a little too bright for me. I debated what to do … Stain? Paint? Dirty-water wash? I feared loosening the shingles with too much water or stain.

I dabbed on a little stain on one shingle–way too dark!

Then it hit me–instead of brushing stain on and wiping off, how about if I wipe the stain off the brush and sort of dry-brush the shingles?

Used a foam brush, stain, and lots of paper towels. Dipped foam brush lightly into stain can and then wiped of a *lot* of the stain from the foam brush.

I started with a downward stroke, then later stroked upward to make the edges of each shingle more defined.

The stain gives it a weathered look.

This is the result. I got some darker blotches I don’t like, which I will tone down with a wash or something, but I like how it turned out. In keeping with the “rustic” feel of the house.

I learned some new techniques with this roof–shingling in strips and dry brushing with stain.

I want to use trim to finish some of the roof’s raw edges, fill in the channel between the front and left roof angle, and do some kind of ridge pole, but the roof is just about done.

With that, the exterior is finished. I will next paint / paper / floor in the interior, figure out what lights I want where, and trim the interior. The kit has trim for the bay windows and the main windows, which I’ll paint and install after I’ve papered and painted.

The last project in the kit is the railing for the stairs and the second floor bannister. I’ll do those after I put in the floors.

Then I’ll start moving in all the antiques! (And at some point do the landscaping).

I might take a little break first. My goal was to get the kit mostly done–now I get to play a little!

Westville: Chimney, Door, Closet

Chimney

Note that the written instructions for the chimney are right, but the line drawing shows it glued together wrong. I’ll demonstrate the right way.

The nine pieces that make up the chimney.

The line drawing shows the slanted sides glued so that the long edge is against the front (the long rectangle), but if it’s glued that way, the chimney top (with the hole in it), won’t fit. The correct way is that the two slanted sides enclose the back and front rectangles; that is, the sides go on top of the back and front. You get a long, narrow box.

Also make sure that the side with the jagged slant goes on the LEFT side of the long rectangle.

This is the piece that will go in the slot of the roof, so it needs to be on the left of the finished chimney.

I found it easier to glue three of the sides together, put in the top piece, and then glue the fourth side on. That way I knew exactly how the top fitted in.

The chimney top is set in about 1/4″ from the edges.

The main pieces glued together.


The four trim pieces glued around the end. I of course couldn’t make mine fit exactly (two shorts are supposed to rest against ends of the two long pieces. I filled in the gaps with wood filler, sanded, and painted. (The trim pieces are glued about 1/8 of an inch from the edge).

The finished, painted chimney (upside down).

The finished chimney in place.

Front Door

The front door is three pieces sandwiched together, with the “glass” in the middle.

Decided on burnt orange for the outside, over stain in the middle (the opposite of the shutters). The interior side of the door is ivory.

For fun, on the interior, I thought I’d add wallpaper to show through the panels.

The interior side of the door glued in place, with the plastic sheet in the middle.

Here’s where the door will go. My front wall came apart when I punched it out, so I’ll have to replace a part of the wall above the door. Or I might go with a transom.

I won’t put the door in until I’m finished wallpapering / painting the interior.

Closet

The closet under the stairs is nicely versatile.

Parts for the closet from left to right: Door, door trim, closet wall, closet ceiling.

The closet set in place (not glued yet). I went with simple white walls and door for now.

The neat thing is, you can have the door closed, or you can glue it partway open to reveal a closet under the stairs, or you can hinge it to make a working door to the closet.

I have not yet decided whether to have the door closed to make a closet filled with antiquey clutter. If so, I will want a light in there so the things can be seen. My tape runs through it, so it’s ready for lights.

If you go with showing the closet, make sure to paint / stain or otherwise finish the backside of the stairs and the inside of the staircase wall (I did not, so I’ll have to stick my paintbrush in there to finish it before I turn it into a closet).

Next–Shingles! And that’s pretty much it for the exterior.